How Wedding Photographers Use Photoshop: Before And After Wedding Photos
Posted by Admin on October 28th 2016
One of the many advantages of hiring an experienced wedding photographer (such as any ISPWP member) is their ability to use tools such as Photoshop to improve and enhance your wedding photos.
There is a wide spectrum of approaches to wedding photography. One on end, there are the photojournalist purists who would never crop, edit, enhance, or modify an image. Their goal is to report exactly what their camera captured and nothing else. On the other end, you have digital artists who love to use every available editing tool, and to create wild works of art that exist only in their imagination.
Probably the vast majority of wedding photographers are somewhere in the middle of that spectrum, and they use Photoshop or other tools to crop images, remove blemishes, enhance colors, and modify various elements in the image. We asked some ISPWP members to show us some examples of how they have taken the original image from the camera and improved it for their clients.
To get to the level of expertise shown in these examples, a photographer has to make significant investments in equipment, software, computers, classes, and of course the investment of time to learn and build the necessary skills.
PHOTOGRAPHER: Ralf Czogallik, Eppel Fotografie, http://www.eppel.nl, Haler, Netherlands wedding photographer
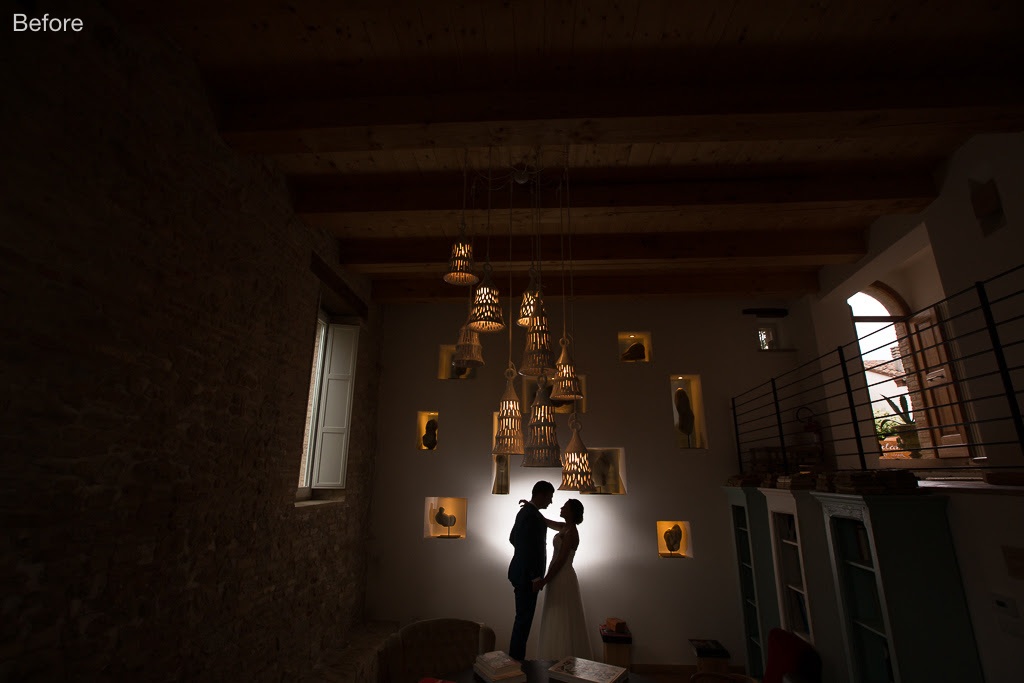
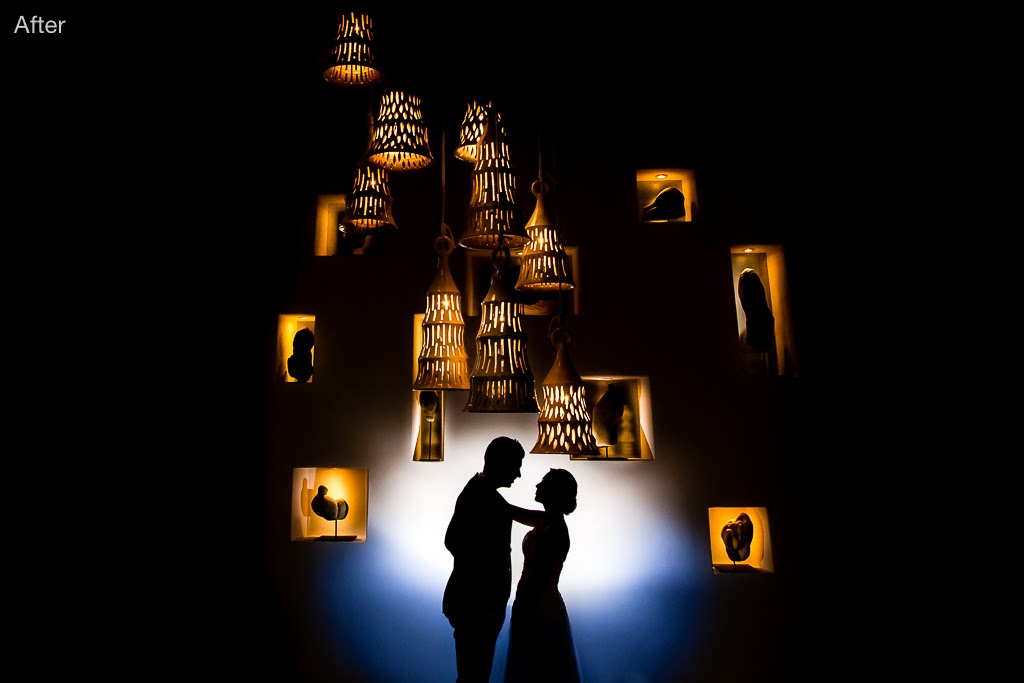
I had an idea with the lights in the library. They were screaming "use us" at me so I tried to make something arty-farty. I used a flash behind the couple to create a bright spot to make the silhouette crispy and then needed to darken the edges and crop the image a little to make it work. With a few simple photoshop steps of brushing and editing, I was able to create a photo for the couple that no one has ever made at this venue. Make photography special and make art for your lovely couples. I took me only 4-5 minutes to create this image.
PHOTOGRAPHER: Victor Lax, Victor Lax Photography, http://victorlax.net/en, Zaragoza, Spain wedding photographer
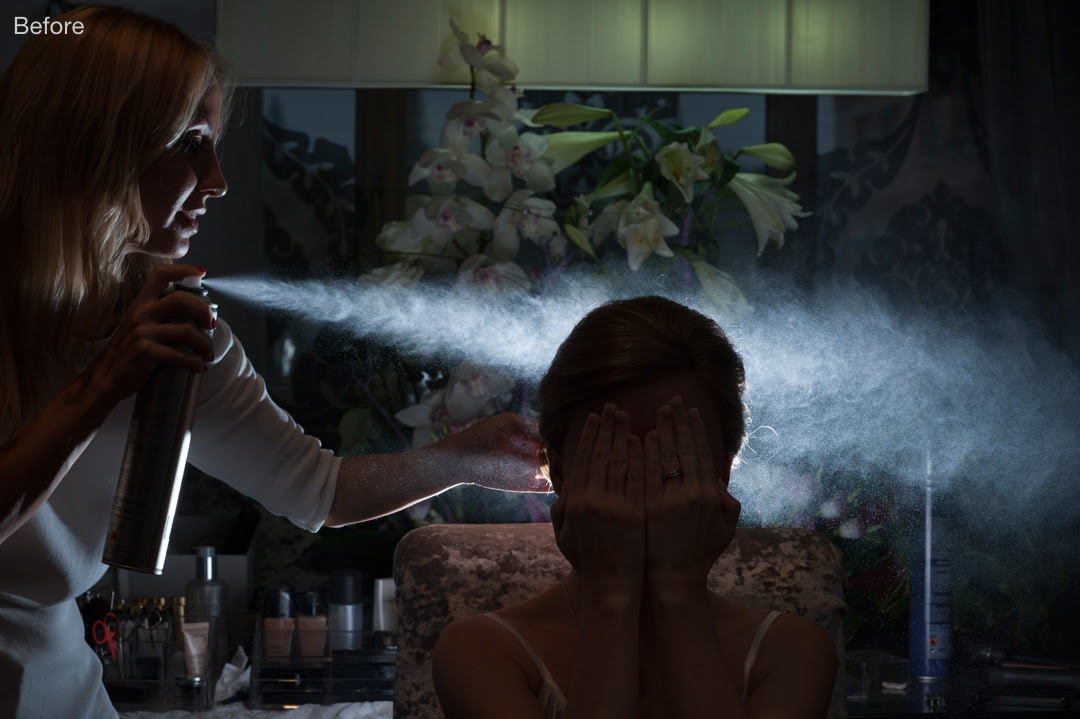
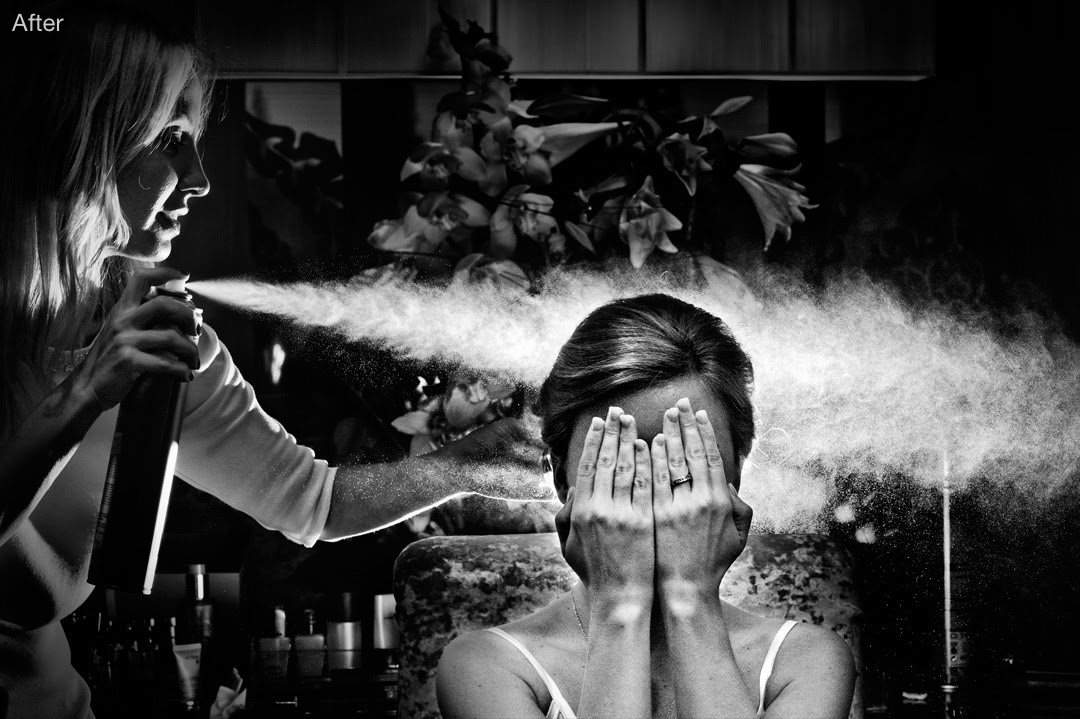
I put a flash behind the bride and I checked the light on the spray (highlight). I did not care if the bride was underexposed. I used Smart Object in Photoshop and first I worked on the highlights (spray), and on the other side I worked in PS on the lowlights trying to recover the shadows. I never use presets or anything like that. I prefer to retouch the black and white with layers in PS.
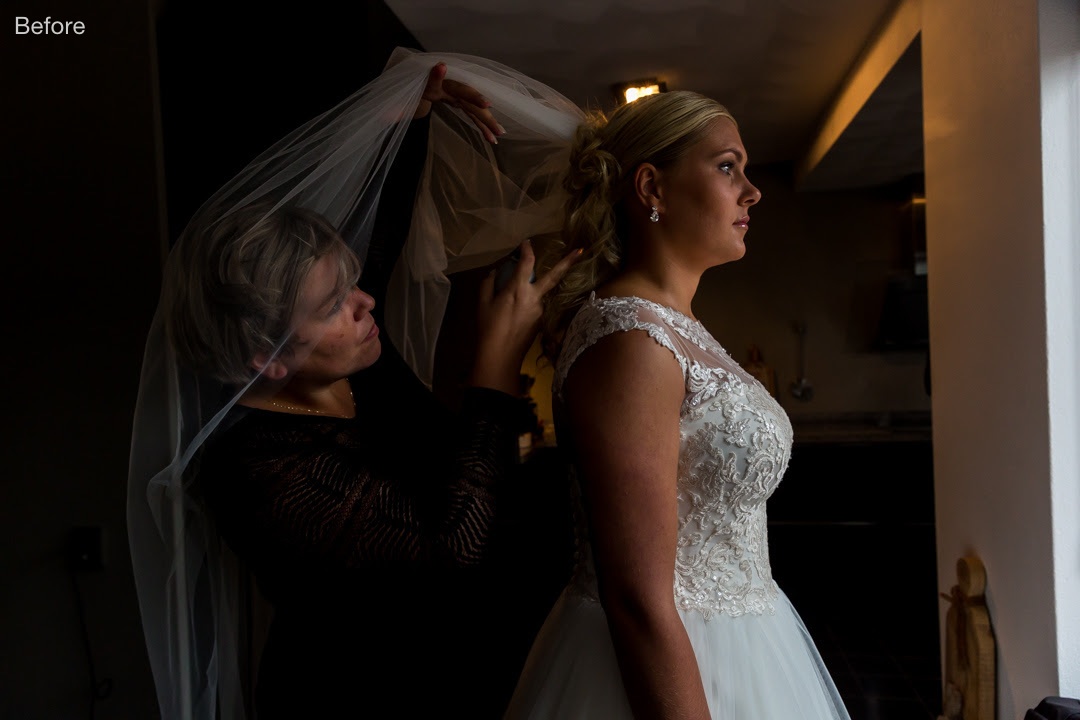
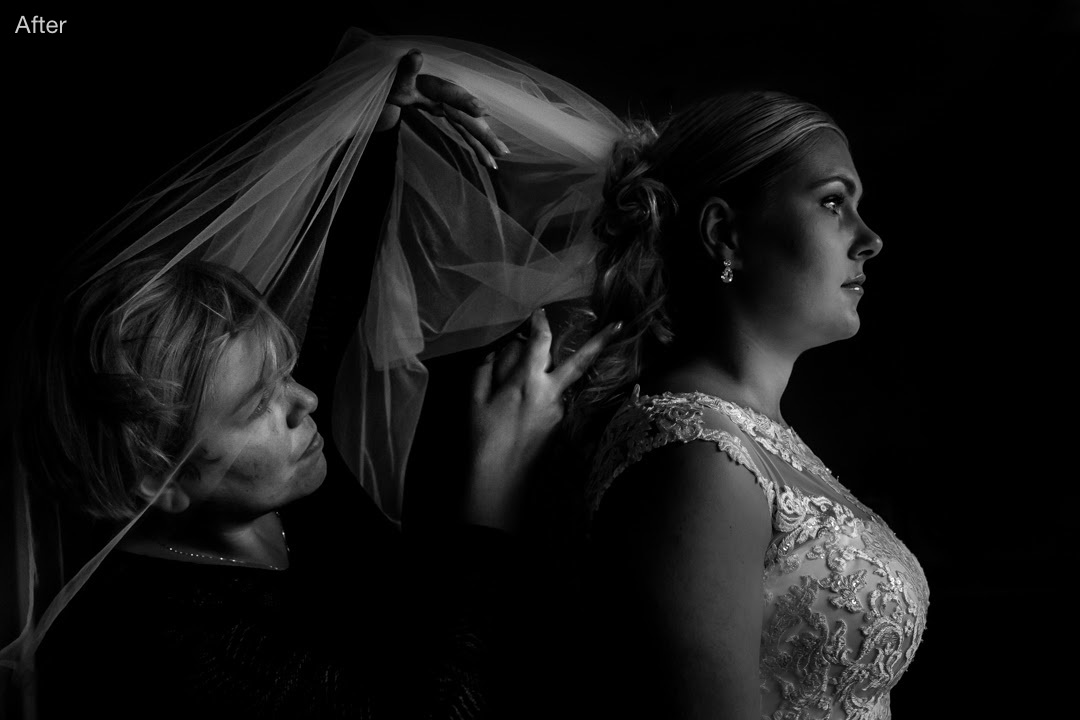
PHOTOGRAPHER: Louise van den Broek, Moments in Life, https://www.momentsinlife.nl, Kraggenburg, Netherlands wedding photographer
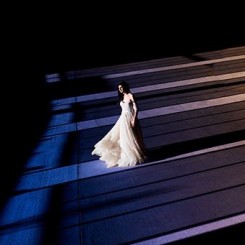
The light in the room was perfect, but I felt that the surrounding was disturbing. A crop was not enough. That is why I used Photoshop to cover/delete all distracting elements like the light in the ceiling. I also cropped the photo. In Lightroom, I finished this photo by using different types of brushes. Be careful with the brush and be very precise because before you know it, the photo is "overdone". There is a but... The basics have to be right before Photoshop really makes a photo better.
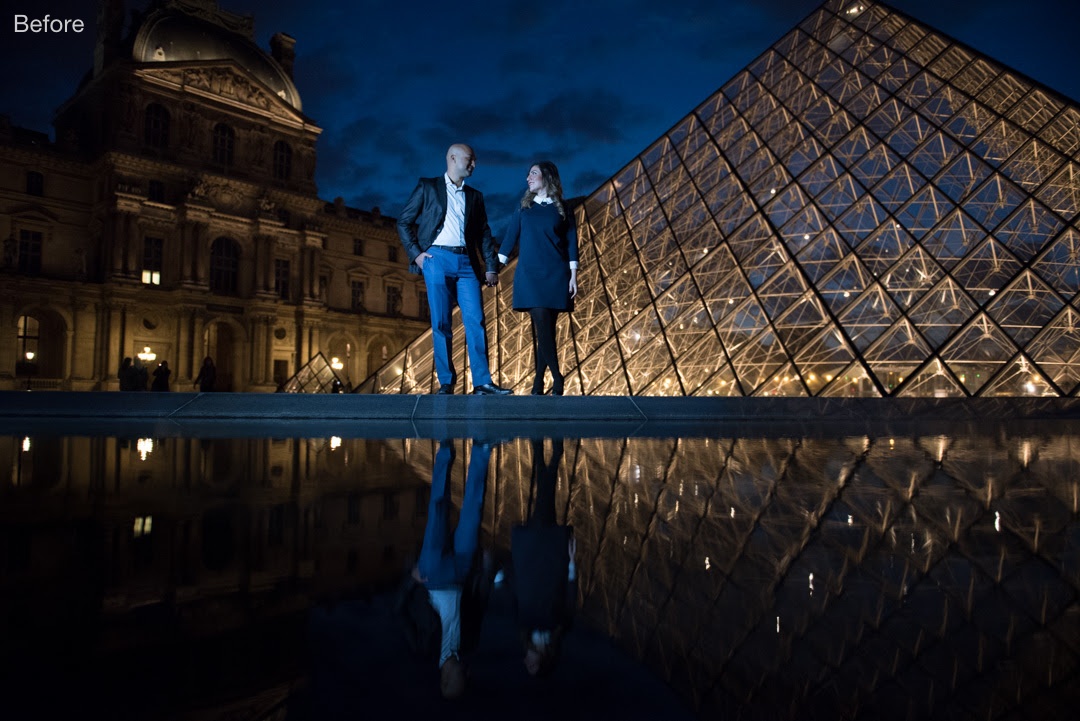
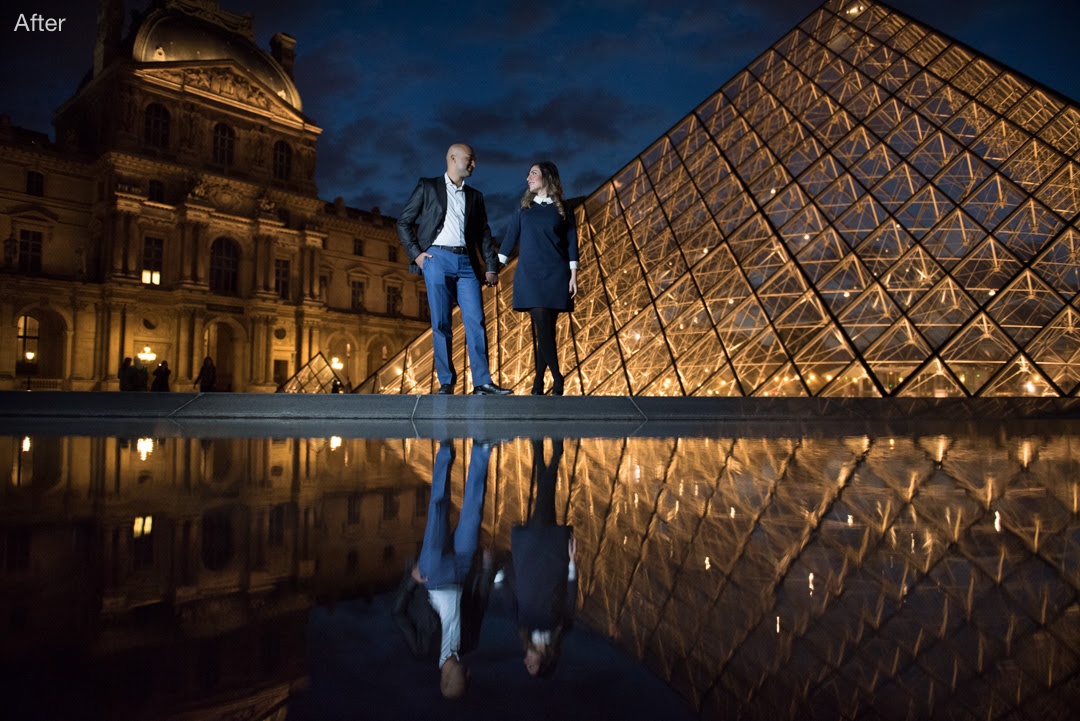
PHOTOGRAPHER: David Bacher, David Bacher Photography, http://www.davidbacher.com, Paris, France wedding photographer
This was an engagement shoot at the Louvre Pyramid at night. There were a couple of problems with the initial RAW image. I used two LED spots to illuminate the couple which created a rather cool light. Thus I used Photoshop to warm up the temperature of the entire photo. I then noticed that parts of the image were too dark, especially the reflection of the couple in the water as well as the old Louvre building behind and the sky. I used the spot brush to increase the exposure in these specific areas only. I left the exposure of the couple and the pyramid untouched.
PHOTOGRAPHER: Elena Fedorova, Elena Fedorova Photography, https://elena-fedorova.com, Playa del Carmen, Mexico wedding photographer
The first main corrections were done to enhance the color and the contrast. That is the usual retouching basic process I apply to all my photographs. And to make the picture look clean and to accentuate more attention on the bride and groom, I removed all the figures and subjects around them. I was using the patch tool, substitute and impose many layers. In general, it took about an hour to retouch this exact picture, but it was worth it.
Other posts you might like :
ISPWP Spring 2019 Wedding Photography Contest Results
ISPWP Spring 2022 Wedding Photography Contest First Time Winner Awards
Best Wedding Photography Of 2021 - ISPWP 1st Place Contest Winning Images
ISPWP Spring 2023 Wedding Photography Contest First Time Winner Awards
ISPWP Spring 2023 Wedding Photography Contest Results


